In between other jobs and things we have been chugging along with the "Art Shack".
I chose some colors for the interior. If you have ever started a color pallet from scratch, you know it can get really complex.
There are so many directions to go. Ultimately I wanted something that would embody the purpose of the Art Shack. A place to relax, recharge and be one with nature, while still having a few modern conveniences. What I felt that came down to was it needed to be natural, restful and cheerful, all at the same time. It also needed to jive with the Oasis color scheme. I decided on these three colors.
The light blue is for the ceiling, which is a little trick of mine for fooling the eye into thinking the ceiling is higher than it really is. I have done this on several projects and the effect is uncanny.
 |
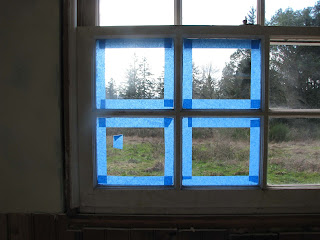
| You can see the tiny sliver of light between the tape and the muntin where you want paint to seal the gap between glass and wood. |
I thought I would point out, for anyone who might be interested, that in order to paint and seal older windows you should tape slightly out from the muntins so a little sliver of paint will seal the crack between wood and glass.
The salvaged cedar boards I found at one of my favorite scrap yards ($4 a board!), were 5/4" thick, which is a little thin for decking so we beefed up the supports on the deck and did joists 16" on center.
That wasn't a big deal or much of a cost increase until we had to buy and cut all the PT (pressure treated) lumber for stringers for the full width steps. I think they will look and feel fabulous when they are finished but it definitely bumped up the cost of the deck.
The weather turned bad and the carpenter had to go on to another job for a while, so I still haven't gotten around to trimming the edge off of the deck, but I am very happy with how it looks and feels. It has plenty of room for a table and chairs or maybe a lounge chair or two.
Still has the best view of all.
 |
| I have had
this green pot for years. I bought it for a pittance because it has a
big crack in it, I love it, but hadn't found a good spot for it 'till
now. The Black bamboo is off Craig's List. |
I used a 2" hole saw to add some interest to the rafters of the porch.
Some polycarbonate scraps from the loafing shed project made an " invisible" roof. I wanted it to keep the rain from running down your neck while loitering at the door or taking off muddy boots, but I didn't want to block out any natural light. I plan to plant an evergreen Clematis to climb up this structure and I know from experience that you cannot, under any circumstances, coax a plant to grow in the direction of shade. This "glass ceiling" will insure that the plant will grow up and around the porch structure and give a great feel to the entry of the Shack.
I also used a bunch of the larger flat stones we gleaned from digging footing holes to make a mud free area leading up to the front step.
The porch still has it's protective cover on the decking so it won't get ruined by paint and drywall dust being tracked back and forth
In addition to a front porch, we put steps between the shack and the Oasis for easy access to the trailer.
I used the same 2" hole saw to make a fun exterior trim for the windows.
They're
just primed for now. It's too cold and wet to paint the trim. That
gives me time to think about what colors I will do the exterior in when
summer comes.
Next: flooring, interior trim, lighting, furnishings, landscaping and Oasis improvements.


No comments:
Post a Comment